So, you’ve got some extra time on your hands these days, and you’ve been eyeing those gorgeous, crusty loaves all over Instagram, wondering if you could actually pull that off in your own kitchen. Well, I’m here to tell you: absolutely, you can. Making sourdough at home isn’t some mystical art reserved for bearded hipsters in Brooklyn—it’s actually a wonderfully forgiving, deeply satisfying hobby that’s perfect for anyone looking to try something new.
I’ll be honest with you: when I first started my sourdough journey, I was intimidated. The whole “wild yeast” thing sounded complicated, and I kept seeing people talk about their starters like they were raising pets. But here’s the beautiful truth—sourdough baking is one of the most beginner-friendly crafts once you understand the basics. It’s forgiving, flexible, and surprisingly low-maintenance once you get into a rhythm.
Let me walk you through everything you need to know to get started, from creating your first starter to pulling that perfect loaf from your oven.
What Exactly Is a Sourdough Starter (And Why Should You Care)?
Think of a sourdough starter as your bread’s engine. Unlike store-bought yeast, a starter is a living culture of wild yeast and beneficial bacteria that you cultivate yourself using just flour and water. It’s what gives sourdough its signature tangy flavor and chewy texture.
Here’s how to make one from scratch:
Day 1: Mix 100g of whole wheat or rye flour with 100g of water in a clean jar. Stir well, cover loosely, and leave at room temperature.
Days 2-7: Each day, discard half of your mixture and feed it with 100g flour and 100g water. You’ll start seeing bubbles around day 3-4—that’s the magic happening!
By day 7, you should have a bubbly, slightly tangy-smelling starter ready for action. The Cambro Sourdough Starter Jar is perfect for this—it has measurement markings so you can track your starter’s growth like a proud parent.

How Do I Know My Starter Is Actually Ready?
This is the million-dollar question for sourdough starter troubleshooting. Your starter is ready when it doubles in size within 4-8 hours of feeding and passes the “float test”—drop a spoonful into water, and it should float.
Look for these signs:
- Lots of bubbles throughout (not just on top)
- A pleasant, slightly sour smell (like yogurt, not acetone)
- A dome-like shape at the peak
- Consistency like thick pancake batter
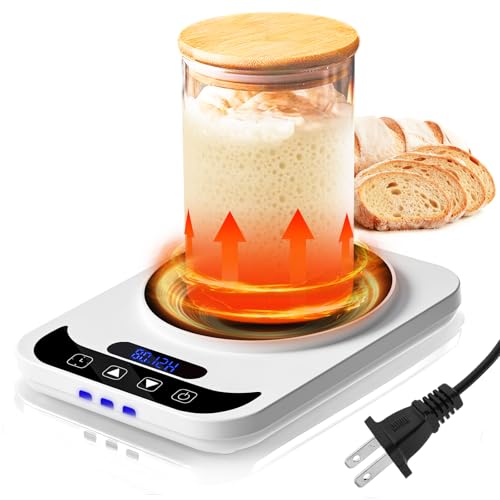
If your starter seems sluggish, don’t panic. Temperature matters enormously—keep it somewhere around 70-75°F for best results.
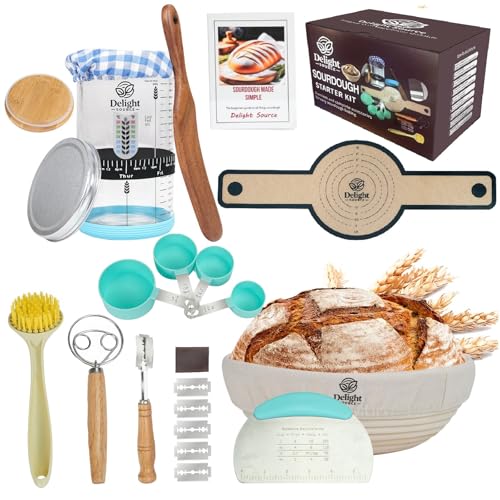
Essential Tools for Making Sourdough at Home
You don’t need a fancy kitchen to start sourdough baking, but a few key tools make life significantly easier:


The Sourdough Bread Baking Kit bundles several essentials together if you want to start with everything at once.
Sourdough vs. Regular Bread: What’s the Real Difference?
Here’s the thing most people don’t realize: sourdough is actually easier on your digestive system than commercial yeast bread. The long fermentation process breaks down gluten and phytic acid, making the nutrients more bioavailable and the bread easier to digest.
Beyond health benefits, sourdough offers:
- Superior flavor complexity with that signature tang
- Longer shelf life (stays fresh for days without preservatives)
- Better texture—chewy crust, open crumb structure
- No commercial yeast required—just flour, water, salt, and your starter
The Feeding Schedule: Sourdough Starter Care Made Simple
How often you need to feed your starter depends on your baking schedule. Here’s my practical approach:
If you’re baking regularly (once a week or more): Keep your starter on the counter and feed it daily. Take out what you need for baking, discard some, then feed with equal parts flour and water.
If you’re baking occasionally: Store your starter in the fridge and feed it weekly. It goes dormant in cold temperatures—think of it as hibernation.
The beauty of sourdough starter maintenance is its flexibility. I’ve revived starters after weeks of neglect. They’re remarkably resilient.
Your First Loaf: A Simple No Knead Sourdough Recipe
Ready for the fun part? Here’s an easy, forgiving no knead sourdough recipe perfect for beginners:
Ingredients:
- 500g bread flour (try Bob’s Red Mill Artisan Bread Flour)
- 350g water (70% hydration—manageable for beginners)
- 100g active starter
- 10g salt
Method:
- Mix everything except salt until no dry flour remains
- Rest 30 minutes, then add salt and mix
- Over 3-4 hours, perform 4 “stretch and folds” every 30 minutes
- Shape loosely and refrigerate overnight in your banneton basket
- Bake at 450°F in a preheated Dutch oven: 20 minutes covered, 25 uncovered
Troubleshooting: Why Didn’t My Bread Rise?
Don’t worry—we’ve all been there. Common culprits include:
- Weak starter: Make sure it’s doubling consistently before baking
- Wrong temperature: Dough needs warmth (75-80°F) for proper fermentation
- Insufficient fermentation time: When in doubt, give it longer
- Overproofing: If it deflates when touched, you’ve gone too far
Check out The Clever Carrot Artisan Sourdough Made Simple for detailed troubleshooting—it saved my sourdough bacon multiple times.
Creative Uses for Sourdough Discard
Here’s a secret: you don’t have to waste anything. Those sourdough discard recipes are game-changers:
- Pancakes and waffles (fluffy and tangy!)
- Crackers (addictively crispy)
- Pizza crust (try the easy sourdough pizza crust method)
- Muffins and quick breads
- Even pasta dough
The Sourdough Discard Recipe Cookbook is dedicated entirely to creative discard uses—worth every penny.
Can You Bake Without a Dutch Oven?
Yes! While the Cast Iron Dutch Oven is ideal for creating steam and achieving that professional crust, alternatives include:
- Baking on a stone with a pan of water underneath
- Covered roasting pan
- Using a stainless steel bowl as a cover
The Dutch oven just makes it easier, especially when you’re learning.
Advanced Tips: Flour Selection and Hydration
Best flour for sourdough? High-protein bread flour gives the best structure. King Arthur Flour Bread Flour is consistently reliable, while Organic Unbleached Bread Flour appeals to health-conscious bakers.
As for sourdough hydration tips: beginners should start around 65-70% hydration (that’s the water-to-flour ratio). Higher hydration creates more open crumb but is trickier to handle.
Small Batch Sourdough and Special Variations
Want to experiment? Try:
- Small batch sourdough (halve the recipe above)
- Gluten-free sourdough bread (using specialized flour blends)
- Whole wheat varieties
- Add-ins like seeds, nuts, or dried fruit
Your Sourdough Journey Starts Now
Here’s what I love most about sourdough: it slows you down in the best possible way. In our rush-rush world, there’s something profoundly satisfying about working with a living ingredient, waiting for dough to rise on its own schedule, and creating something nourishing with your own hands.
You might mess up your first loaf. Heck, I definitely did. But by your third or fourth attempt, you’ll pull a gorgeous, crusty loaf from your oven and think, “I made this.” And trust me, that feeling never gets old.
Ready to get started? Grab a jar, some flour, and water. Your starter is waiting to come to life. And if you want to skip the starter-building phase, the Tik Tok Famous “Eve” Sourdough Starter gets you baking immediately.
Drop a comment below and tell me—are you starting from scratch or do you have questions about your existing starter? Let’s build this sourdough community together.
Happy baking!
Affiliate Disclosure: This post contains affiliate links, which means I may earn a small commission if you click through and make a purchase, at no additional cost to you. I only recommend products I personally use or believe will add value to your sourdough journey. Your support helps keep this content free and helps me continue sharing helpful baking tips and guides. Thank you for your support!